How to use Truelist with Clay
Truelist’s API integrates directly into Clay tables via the HTTP API column type, letting you validate email addresses as part of any enrichment workflow. This guide walks you through generating an API key, configuring the HTTP API column, and mapping the results back to your table.
How the integration works
Clay calls Truelist’s POST /api/v1/verify_inline endpoint once per row. Truelist validates the email address and returns two fields:
- Email State — the overall verdict:
ok,risky,invalid, orunknown. - Email Sub State — a more granular result that describes exactly why an address was flagged. See Understanding Verification Results for the full list of values.
You add both as columns in your Clay table and use them to filter, route, or suppress records downstream.
Step 1 — Generate an API key in Truelist
Log in to your Truelist account and go to Settings → API Keys. Click Add Key, name it something like “Clay”, and save.
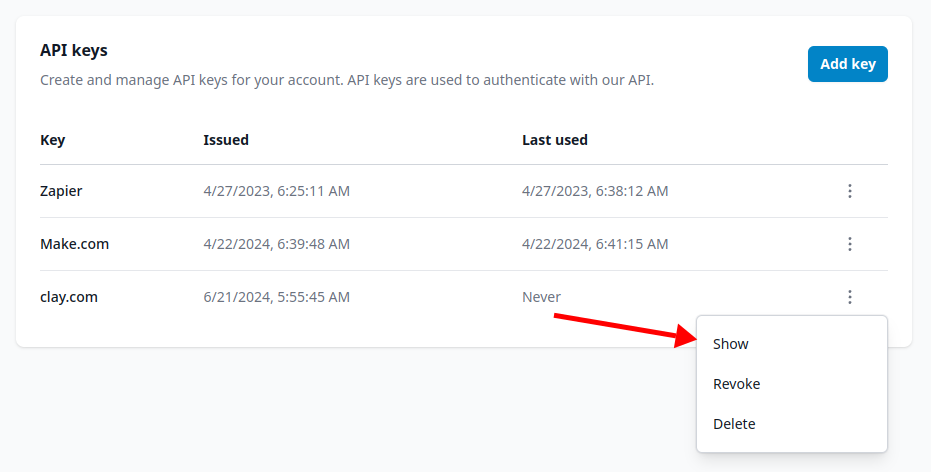
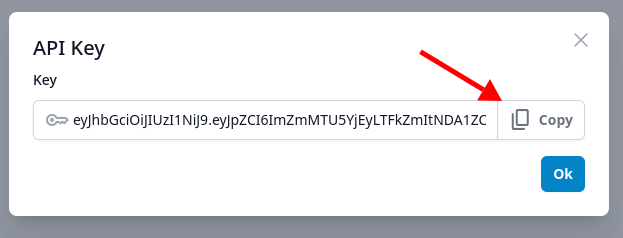
Find the key you just created in the list, click the three-dot menu, and click Show to reveal the key. Then click the Copy button to copy it to your clipboard.
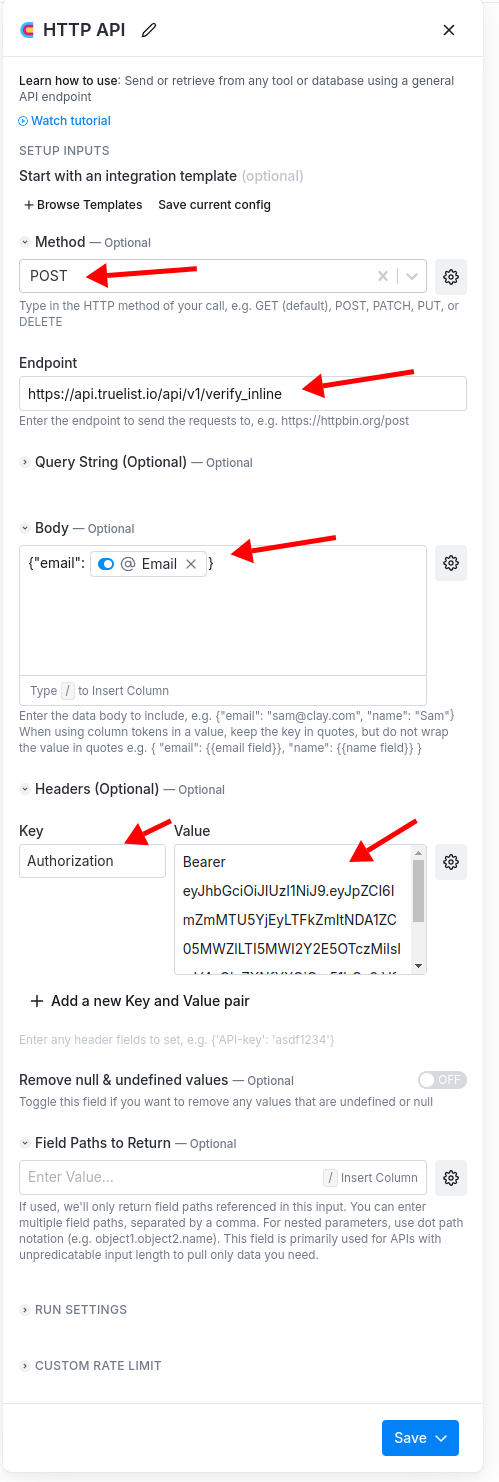
Step 2 — Add an HTTP API column in Clay
Open the Clay table you want to enrich. Add a new column and select the HTTP API column type.
Configure it as follows:
- Method:
POST - Endpoint:
https://api.truelist.io/api/v1/verify_inline - Body:
{ "email": {{email}} }— type/to insert the email column from the dropdown, so Clay interpolates the value at runtime. - Headers:
- Key:
Authorization - Value:
Bearer <your-api-key>— replace<your-api-key>with the key you copied in Step 1.
- Key:
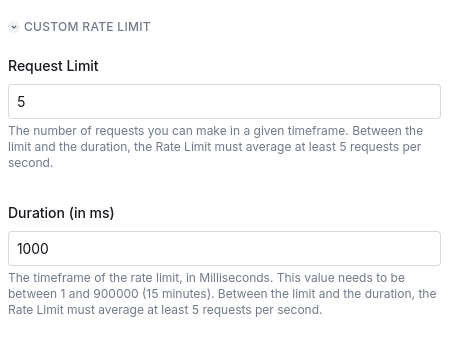
Set the rate limit
Scroll to the Rate Limit section and set:
- Request limit:
5 - Duration (ms):
1000
This keeps Clay within Truelist’s per-second limit. Click Save.
Step 3 — Run the column
Click the Run column (play) button to start validating the email addresses in your table. Each row will show a 200 status once it has been processed.
Step 4 — Add the result fields as columns
Click the play button on any individual row to open the Cell Details panel. You will see the full Truelist response, including email_state and email_sub_state.
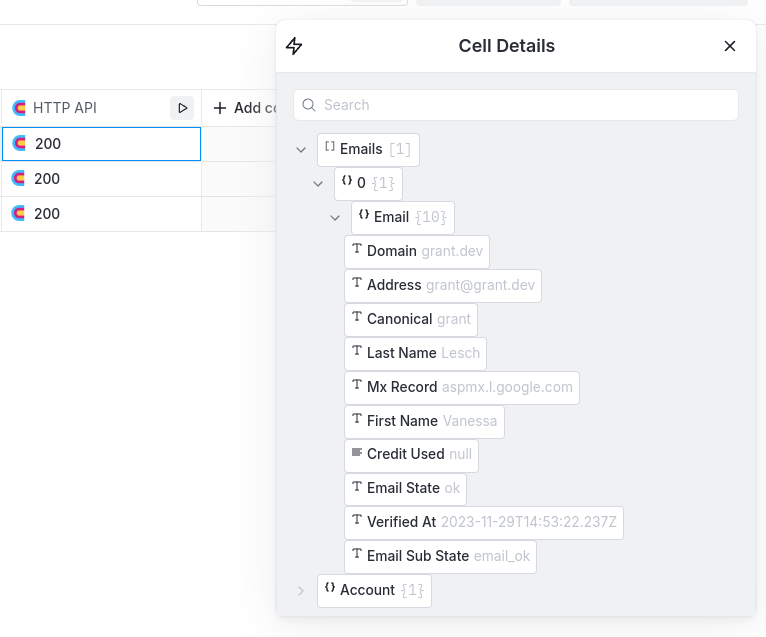
Hover over each field and click Add as column to add them to your table. You can then use those columns in filters, branches, or downstream steps in your Clay workflow.
A note on rate limiting
If you are on the Growth plan, some rows may return rate-limit errors during a large run. This is expected — simply click Run column again to retry the rows that did not complete. Repeat until all rows show a 200 status. See our pricing page for rate limit details by plan.
Frequently Asked Questions
Which endpoint should I use?
Use POST https://api.truelist.io/api/v1/verify_inline. This is the real-time single-address endpoint designed for row-by-row enrichment in tools like Clay.
What body format does Truelist expect?
JSON with a single email key: { "email": "address@example.com" }. Make sure to insert the email column via Clay’s / interpolation so the value is substituted per row.
Why do I need to set a rate limit in Clay?
Truelist enforces per-second request limits that vary by plan. Setting the Clay rate limit to 5 requests per 1000 ms keeps you within those limits and avoids failed rows.
What do the email state values mean?
ok— Valid address, safe to send to.risky— Possibly valid but carries risk (e.g. disposable or role address).invalid— Invalid address. Do not send.unknown— Truelist could not determine validity.
See Understanding Verification Results for a full breakdown including all sub-state values.
Do validated results get cached?
Yes. Truelist caches results per email address. If the same address appears in multiple Clay runs, it will not consume additional credits within the revalidation window configured in your validation settings.