How to integrate Truelist with Constant Contact
Truelist has a direct integration with Constant Contact that validates your contact list and writes the validation result back to each contact as a custom field. This guide walks you through setup and day-to-day management.
How the integration works
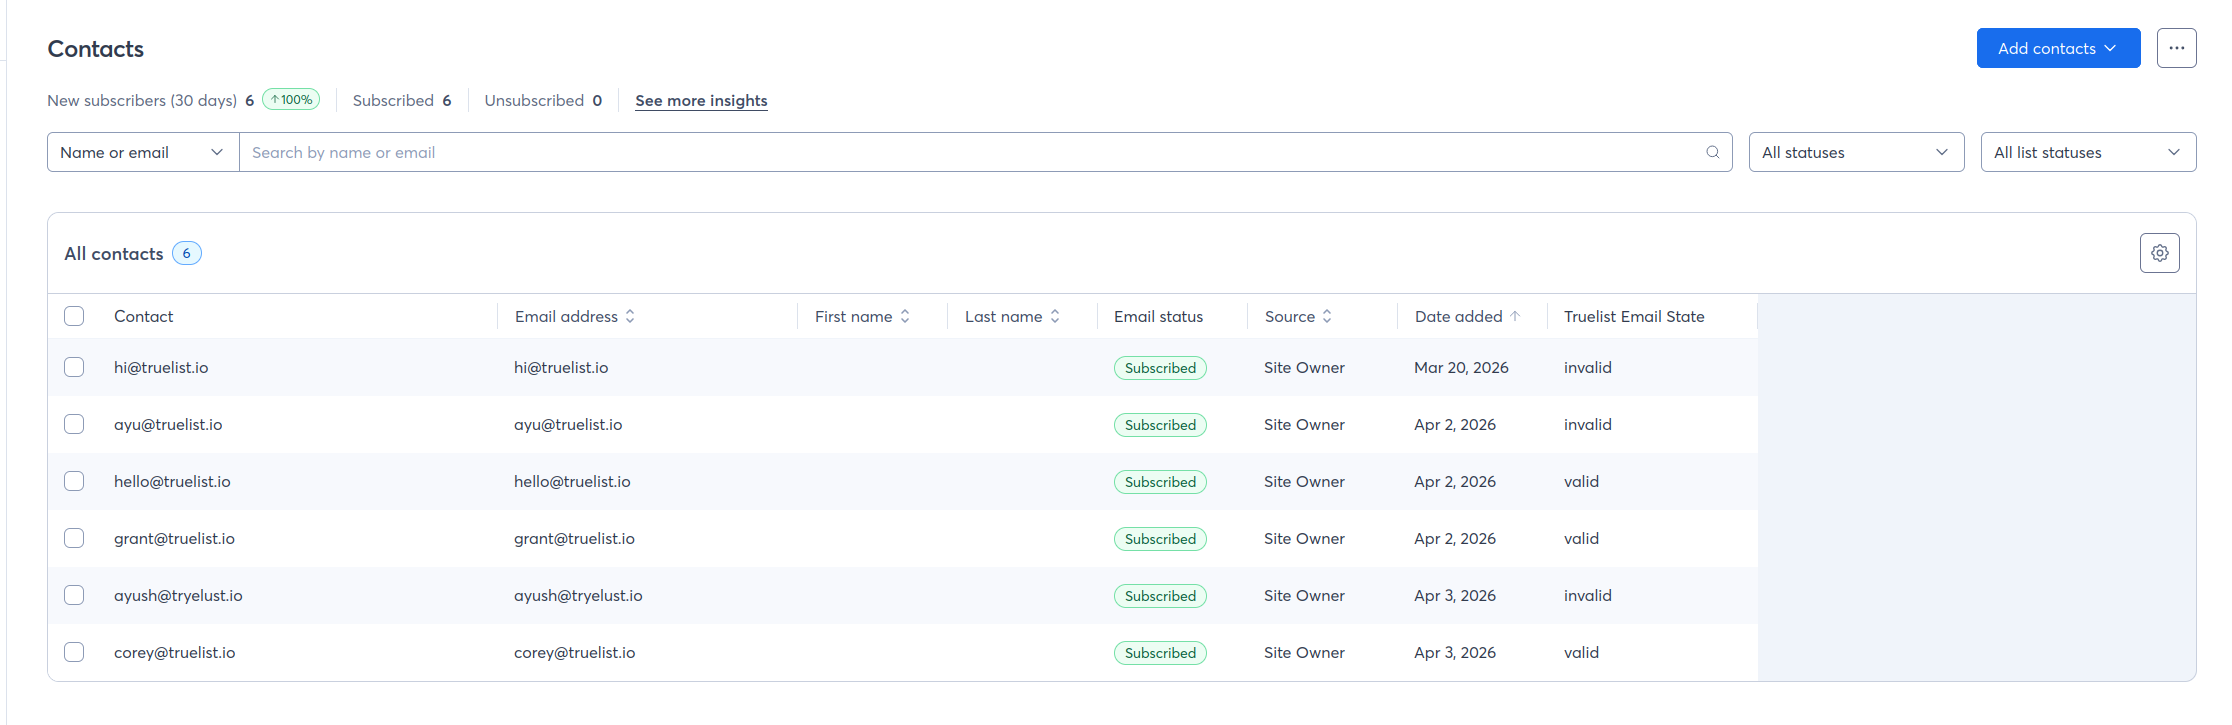
When you connect Constant Contact, Truelist fetches all contacts from the list you select and runs each email address through its full validation pipeline. Once validation is complete, Truelist updates each contact with a custom field called Truelist Email State:
- valid — The email address is valid and safe to send to.
- risky — The email address may be valid but carries some risk (e.g. a disposable or role address).
- invalid — The email address is invalid and should not be sent to.
- unknown — Truelist could not determine the validity of the email address.
You can use this field in Constant Contact to build segments, suppress invalid addresses from campaigns, and keep your contact list clean over time.
After setup, Truelist can validate your list automatically on a weekly basis, or you can trigger a sync manually at any time.
Step-by-Step Setup
Go to Settings → Integrations in your Truelist account.
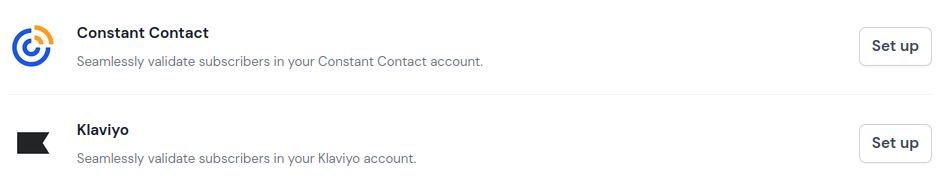
Find the Constant Contact card under Available integrations and click Set up.
Click Authorize with Constant Contact.

You will be redirected to Constant Contact to grant Truelist access to your contacts.
Follow the prompts to authorize Truelist. Once complete, you will be redirected back to Truelist.
On the Constant Contact settings page, use the Contact List dropdown to select the list you want to validate.
Click Save.
Click Sync now to kick off your first validation run.
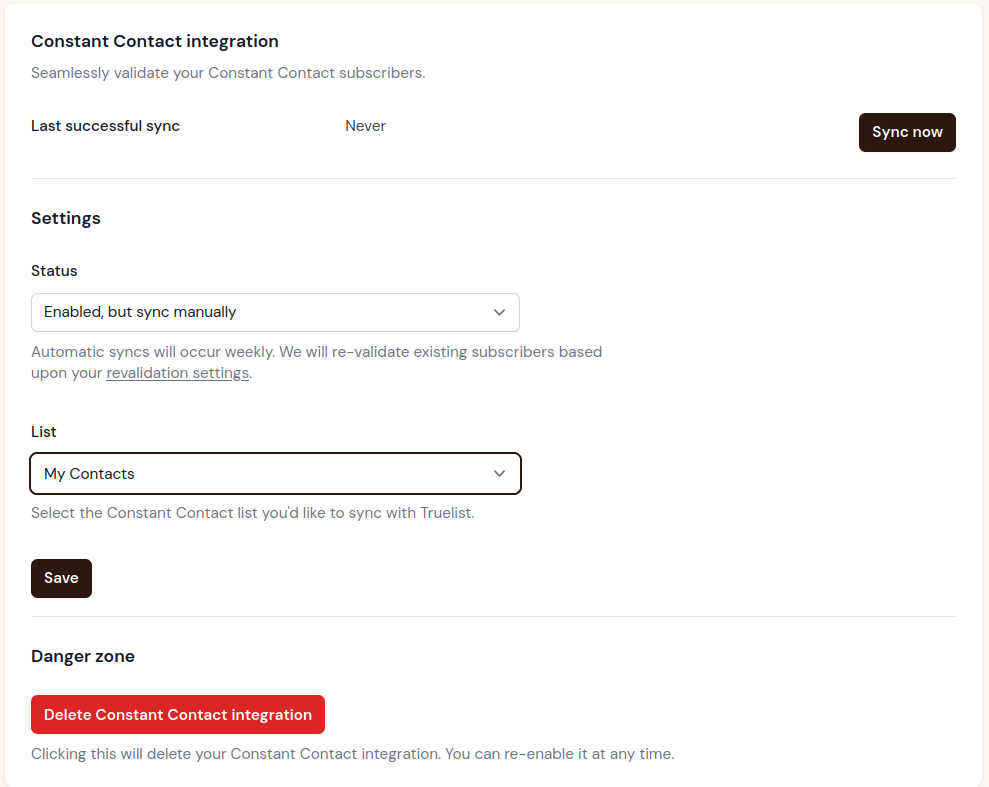
Important: You must select a list and click Save before clicking Sync now. Syncing without a list selected will not start.
Viewing sync results in Truelist
After a sync completes, validation results are written directly to your Constant Contact account as the Truelist Email State custom field. You can also view a summary of sync results in Truelist under Reports → Completed Lists.

Note: Results are written directly to your Constant Contact account as a custom field — they are not stored as a downloadable file. If you try to download a verified CSV from Constant Contact, it will be empty. To view your results, go to Reports → Completed Lists in Truelist and select the list from the dropdown.
Making Truelist Email State visible on contact pages
Constant Contact does not show custom fields in the contact view by default. To see the Truelist Email State value on each contact’s page, you need to enable it once:
In Constant Contact, open any contact’s detail page.
Click the Settings (gear) icon in the top-right of the contact view.

Scroll to the bottom of the settings panel. Under Custom Fields, find Truelist Email State and toggle it on.
Click Save.
The field will now appear on all contact detail pages, showing the validation result written by Truelist after each sync.
Managing the Integration
Selecting a list
Use the Contact List dropdown to choose which Constant Contact list Truelist should validate. After changing the list, click Save to apply.
Sync settings
Use the Status dropdown to control how syncing works:
- Enabled, sync automatically — Truelist will validate your contact list on a weekly basis without any manual action.
- Enabled, but sync manually — Syncing is enabled but will only run when you click Sync now.
- Disabled — Syncing is paused. No new validations will run until you re-enable it.
Syncing now
Click the Sync now button to immediately kick off a validation of your selected list. Truelist will only validate email addresses that have not been validated recently. Existing results are cached and re-used based on your revalidation settings.
Deleting the integration
Click the Delete Constant Contact integration button to remove the connection entirely. This stops all syncing. It will not delete any data in Constant Contact or Truelist — your existing custom field values and validation history are preserved. You can reconnect at any time.
Using validation results in Constant Contact
Once a sync completes, each contact will have their Truelist Email State custom field updated. Here are some common ways to put the results to use.
Suppress invalid addresses from campaigns
When creating a campaign, add a contact filter to exclude contacts where Truelist Email State equals invalid. This prevents sending to bad addresses that would raise your bounce rate.
Build a clean segment for high-value sends
Create a segment with the condition Truelist Email State = valid. Use this segment for re-engagement campaigns or any send where deliverability is critical.
Quarantine risky addresses
Create a separate segment for contacts where Truelist Email State = risky. You can suppress these from regular sends while continuing to email validated addresses, or review them manually before deciding.
Remove unknowns after repeated syncs
If a contact still shows Truelist Email State = unknown after two or three sync cycles, consider suppressing or removing them. A persistent unknown result often indicates a problematic address.
Frequently Asked Questions
How often will my list sync automatically?
When set to automatic, Truelist will sync your list once per week.
Will Truelist re-validate contacts it has already checked?
Yes. Truelist re-validates existing contacts according to the revalidation period configured in your validation settings. The default is 60 days.
Can I validate my list on demand?
Yes. Click Sync now on the Constant Contact settings page to trigger an immediate validation run. Make sure you have selected a list and clicked Save first.
Does Truelist validate all contacts or just new ones?
Each sync fetches all contacts from your selected list. Truelist skips addresses that were validated recently (within your revalidation window) and only runs validation on new or stale addresses, so credits are not wasted on re-checking recent results.
Will the integration change any contact data other than Truelist Email State?
Truelist only writes the Truelist Email State custom field. It does not modify any other contact fields, delete contacts, or unsubscribe anyone.
Why can’t I see the Truelist Email State field on a contact’s page?
You need to enable it in the contact view settings. Open a contact, click the Settings (gear) icon, find Truelist Email State under Custom Fields, and toggle it on. See Making Truelist Email State visible above.
What happens if my Constant Contact access is revoked?
If Truelist cannot authenticate with Constant Contact during a sync, the integration will be automatically disabled and you will receive an email notification. Go to Settings → Integrations → Constant Contact and reconnect by clicking Authorize with Constant Contact.